Debian 7 下电子邮件系统的搭建(apache2 + postfix + dovecot + rainloop + mysql)
这两天心血来潮,准备在Debian 7 下搭建一个电子邮件系统,然后就去学习了一下。
根据度娘定义:电子邮件系统由用户代理MUA(Mail User Agent)以及邮件传输代理MTA(Mail Transfer Agent),MDA(Mail Delivery Agent)邮件投递代理组成。
Mail User Agent (MUA):邮件使用者代理人,这是使用者用来写信、收信的程序。例如,我们常用的 Outlook Exporess、Thunderbird 等。它的作用在于提供使用者一个好用的收发信件接口,并将信传到自己的邮件服务器。这个一般不需要自己弄,我在安卓手机上用gmail客户端,win7电脑上用foxmail客户端,当然在手机和电脑上都可以使用浏览器,通过webmail访问邮箱,我使用的是rainloop,它是使用MUA方式在服务器上实现的webmail解决方案。
Mail Delivery Agent (MDA):邮件递送代理人,负责将要给本地使用者的邮件分配到使用者的信箱中。在 UNIX 中,MDA 通常是 mail 这支程序。
Mail Transfer Agent (MTA):邮件转送代理人,是一个负责转送信件的服务器。UNIX 中使用的 Sendmail、Postfix 就是 MTA 软件。它的作用在于收到 MTU 寄来的信后,根据信件地址,将信件转送到目的地。在目的地中,也有另一台 MTA 会负责接收信件。有时候信件并不会一次就从使用者的计算机传送到目的地的主机,而是会经由许多 MTA 转送到目的地的主机。这种 MTA 接收非自己的信件,并转送到别台 MTA 的动作就叫作「Relay」。
另外,还需要了解到:
POP3
POP3是Post Office Protocol 3的简称,即邮局协议的第3个版本,它规定怎样将个人计算机连接到Internet的邮件服务器和下载电子邮件的电子协议。它是因特网电子邮件的第一个离线协议标准,POP3允许用户从服务器上把邮件存储到本地主机(即自己的计算机)上,同时删除保存在邮件服务器上的邮件,而POP3服务器则是遵循POP3协议的接收邮件服务器,用来接收电子邮件的。
IMAP
IMAP全称是Internet Mail Access Protocol,即交互式邮件存取协议,它是跟POP3类似邮件访问标准协议之一。不同的是,开启了IMAP后,您在电子邮件客户端收取的邮件仍然保留在服务器上,同时在客户端上的操作都会反馈到服务器上,如:删除邮件,标记已读等,服务器上的邮件也会做相应的动作。所以无论从浏览器登录邮箱或者客户端软件登录邮箱,看到的邮件以及状态都是一致的。
区别:
POP3协议允许电子邮件客户端下载服务器上的邮件,但是在客户端的操作(如移动邮件、标记已读等),不会反馈到服务器上,比如通过客户端收取了邮箱中的3封邮件并移动到其他文件夹,邮箱服务器上的这些邮件是没有同时被移动的 。而IMAP提供webmail 与电子邮件客户端之间的双向通信,客户端的操作都会反馈到服务器上,对邮件进行的操作,服务器上的邮件也会做相应的动作。
SMTP
SMTP 的全称是“Simple Mail Transfer Protocol”,即简单邮件传输协议。它是一组用于从源地址到目的地址传输邮件的规范,通过它来控制邮件的中转方式。SMTP 协议属于 TCP/IP 协议簇,它帮助每台计算机在发送或中转信件时找到下一个目的地。SMTP 服务器就是遵循 SMTP 协议的发送邮件服务器。
SMTP 认证,简单地说就是要求必须在提供了账户名和密码之后才可以登录 SMTP 服务器,这就使得那些垃圾邮件的散播者无可乘之机。
增加 SMTP 认证的目的是为了使用户避免受到垃圾邮件的侵扰。
当然,为了实现这些功能还需要装一些辅助软件,例如web服务器软件,数据库软件等等。
我所用的软件包括:
1). web服务器:apache2
2). MTA & MDA(实现SMTPS):postfix
3). IMAP 和 POP3电子邮件服务器:dovecot
4). 数据库软件:mysql
5). webmail(MUA模式):rainloop免费版
6). 交互网页语言支持:php
7). 后台管理软件:postfixadmin
0、安装前准备工作:
a.申请一个域名,DNS绑定vps的ip地址,添加spf记录,做好反向DNS(Reverse DNS)解析
找个国外的域名供应商,千万别买国内的。。。国外的可以找name.com或者godaddy上搜一个,然后注册,绑定vps的公网ip地址,添加spf记录(Sender Policy Framework。翻译过来就是发信者策略架构,SPF是为了防范垃圾邮件而提出来的一种DNS记录类型,它是一种TXT类型的记录,它用于登记某个域名拥有的用来外发邮件的所有IP地址。),防止你的邮件服务器发出的信被认为是垃圾邮件。
我添加了两个spf,分别是v=spf1 ip4:我的IP ~all 和 v=spf1 mx -all,另外还在vps供应商处做了反向DNS的解析。
b.在vps中添加hostname
1).修改 /etc/hostname 添加一个名字,例如:holycoco。
echo "holycoco" > /etc/hostname
2).使之生效。
hostname -F /etc/hostname
3).修改 /etc/hosts,添加一些内容,如果网站是example.com,就这样写,如果网站是别的就填别的。
127.0.0.1 localhost.localdomain localhost
我的IP holycoco.example.com holycoco
4).检查host。
hostname
hostname -f
前者应该显示holycoco,后者应该显示holycoco.example.com,千万别略过这步骤,否则会后悔的。。。
1、安装apache2
a.安装
apt-get install apache2
cp /etc/apache2/apache2.conf /etc/apache2/apache2.backup.conf
vi /etc/apache2/apache2.conf
b.由于我的vps内存只有1GB所以进行优化:
KeepAlive Off
...
<IfModule mpm_prefork_module>
StartServers 2
MinSpareServers 6
MaxSpareServers 12
MaxClients 80
MaxRequestsPerChild 3000
</IfModule>
c.重启服务
service apache2 restart
d.禁用apache默认设置,创建一些文件夹,做一些配置
a2dissite *default
cd /var/www
mkdir example.com
mkdir -p example.com/public_html
mkdir -p example.com/log
mkdir -p example.com/backups
vi /etc/apache2/sites-available/example.com.conf
e.为了支持多个域名,编辑内容如下,(重启apache以后可能会有warning,因为还没建后面几个文件夹)
# domain: example.com
# public: /var/www/example.com/public_html/
<VirtualHost *:80>
  # Admin email, Server Name (domain name), and any aliases
  ServerAdmin webmaster@example.com
  ServerName  www.example.com
  ServerAlias example.com
  # Index file and Document Root (where the public files are located)
  DirectoryIndex index.html index.php
  DocumentRoot /var/www/example.com/public_html
  # Log file locations
  LogLevel warn
  ErrorLog  /var/www/example.com/log/error.log
  CustomLog /var/www/example.com/log/access.log combined
</VirtualHost>
<VirtualHost *:80>
  DirectoryIndex index.html index.php
  DocumentRoot /var/www/example.com/public_html/postfixadmin
  ServerName pfadmin.example.com
</VirtualHost>
<Directory /var/www/example.com/public_html/webmail>
  Options FollowSymLinks
  <IfModule mod_php5.c>
    php_flag register_globals off
  </IfModule>
  <IfModule mod_dir.c>
    DirectoryIndex index.php
  </IfModule>
</Directory>
<Directory /var/www/example.com/public_html/webmail/data>
 deny from all
</Directory>
<VirtualHost *:80>
  DirectoryIndex index.html index.php
  DocumentRoot /var/www/example.com/public_html/webmail
  ServerName webmail.example.com
</VirtualHost>
f.使配置文件生效,重启服务
a2ensite example.com.conf
service apache2 restart
2、安装mysql
a.安装
apt-get install mysql-server
mysql_secure_installation
设置完root的密码,一定要自己记录下来。。。
另外安全设置时要删除匿名用户,删除默认测试数据库,禁止root远程登录
b.为1GB内存进行优化
vi /etc/mysql/my.cnf
max_connections = 75
key_buffer = 32M
max_allowed_packet = 1M
thread_stack = 128K
table_cache = 32
c.创建数据库,后面要用:
mysql -u root -p
create database mynamemailserver;
GRANT all privileges  ON mynamemailserver.* TO 'mymailuser'@'holycoco.example.com' IDENTIFIED BY 'mypassword';
GRANT all privileges  ON mynamemailserver.* TO 'mymailuser'@'127.0.0.1' IDENTIFIED BY 'mypassword';
d.重启数据库服务
service mysql restart
这里可以不建表,因为装postadmin的时候会建的。。。
3、安装php支持
a.安装
apt-get install php5 libapache2-mod-auth-mysql libmysqlclient15-dev php5-mysql curl libcurl3 libcurl3-dev php5-curl php5-json php-pear
b.为1GB内存进行优化,修改部分内容
vi /etc/php5/apache2/php.ini
max_execution_time = 30
memory_limit = 128M
error_reporting = E_COMPILE_ERROR|E_RECOVERABLE_ERROR|E_ERROR|E_CORE_ERROR
display_errors = Off
log_errors = On
error_log = /var/log/php/error.log
register_globals = Off
c.记录日志,重启web服务,加载php模块
mkdir -p /var/log/php
chown www-data /var/log/php
service apache2 restart
4.安装postfix和dovecot
a.安装
apt-get install postfix postfix-mysql dovecot-core dovecot-imapd dovecot-pop3d dovecot-lmtpd dovecot-mysql
弹出的框里面Postfix configuration选Internet Site,System mail name填入example.com,如果网站是别的就填别的。
b.配置postfix,限制用户邮箱大小等一系列东东,用户认证使用dovecot,而不是默认的virtual_mailbox
cp /etc/postfix/main.cf /etc/postfix/main.cf.orig
vi /etc/postfix/main.cf
/etc/postfix/main.cf 参数必须顶格写。。。。。。。。。。。。内容为:
# See /usr/share/postfix/main.cf.dist for a commented, more complete version
# Debian specific:  Specifying a file name will cause the first
# line of that file to be used as the name.  The Debian default
# is /etc/mailname.
#myorigin = /etc/mailname
smtpd_banner = $myhostname ESMTP $mail_name (Debian/GNU)
biff = no
# appending .domain is the MUA's job.
append_dot_mydomain = no
# Uncomment the next line to generate "delayed mail" warnings
#delay_warning_time = 4h
readme_directory = no
# TLS parameters
#smtpd_tls_cert_file=/etc/ssl/certs/ssl-cert-snakeoil.pem
#smtpd_tls_key_file=/etc/ssl/private/ssl-cert-snakeoil.key
#smtpd_use_tls=yes
#smtpd_tls_session_cache_database = btree:${data_directory}/smtpd_scache
#smtp_tls_session_cache_database = btree:${data_directory}/smtp_scache
smtpd_tls_cert_file=/etc/dovecot/dovecot.pem
smtpd_tls_key_file=/etc/dovecot/private/dovecot.pem
smtpd_use_tls=yes
smtpd_tls_auth_only = yes
#Enabling SMTP for authenticated users, and handing off authentication to Dovecot
smtpd_sasl_type = dovecot
smtpd_sasl_path = private/auth
smtpd_sasl_auth_enable = yes
smtpd_recipient_restrictions =
          permit_sasl_authenticated,
          permit_mynetworks,
          reject_unauth_destination
# See /usr/share/doc/postfix/TLS_README.gz in the postfix-doc package for
# information on enabling SSL in the smtp client.
inet_interfaces = all
myhostname = holycoco.example.com
alias_maps = hash:/etc/aliases
alias_database = hash:/etc/aliases
myorigin = /etc/mailname
mydestination = localhost
relayhost =
mynetworks = 127.0.0.0/8 [::ffff:127.0.0.0]/104 [::1]/128
mailbox_command = procmail -a "$EXTENSION"
mailbox_size_limit = 0
recipient_delimiter = +
#Handing off local delivery to Dovecot's LMTP, and telling it where to store mail
virtual_transport = lmtp:unix:private/dovecot-lmtp
# Virtual mailbox settings.

virtual_mailbox_maps = mysql:/etc/postfix/mysql-virtual-mailbox_maps.cf
virtual_mailbox_domains = mysql:/etc/postfix/mysql-virtual-mailbox-domains.cf
virtual_alias_maps = mysql:/etc/postfix/mysql-virtual-alias-maps.cf
virtual_uid_maps = static:postfix 用户的uid

virtual_gid_maps = static:postfix 用户的gid

message_size_limit = 102400000
virtual_mailbox_limit = 2097152000
virtual_create_maildirsize = yes
virtual_mailbox_extended = yes
virtual_mailbox_limit_maps = mysql:/etc/postfix/mysql-virtual-mailbox-limit-maps.cf
virtual_mailbox_limit_override = yes
virtual_maildir_limit_message = Sorry, the user's maildir has exceeded the quota.
virtual_overquota_bounce = yes
virtual_uid_maps 和 virtual_gid_maps 改成postfix用户的uid和gid ,可用 id postfix 命令获取
注:postfix服务重启后会有warning,据说可以别理它。。。
c.添加数据库查询配置文件,用来认证用户登录时候的sql语句
这些表现在还没建,后面装postfixadmin的时候会自动建的
vi /etc/postfix/mysql-virtual-alias-maps.cf
这个是转发表查询
user = mymailuser
password = mypassword
hosts = 127.0.0.1
dbname = mynamemailserver
query = SELECT goto FROM alias WHERE address='%s' AND active = '1'
#query = SELECT destination FROM virtual_aliases WHERE source='%s'
vi /etc/postfix/mysql-virtual-mailbox-domains.cf
这个是domain表查询
user = mymailuser
password = mypassword
hosts = 127.0.0.1
dbname = mynamemailserver
query = SELECT domain FROM domain WHERE domain='%s' AND active = '1'
vi /etc/postfix/mysql-virtual-mailbox-limit-maps.cf
这个是邮箱空间配额查询,不知道有没有用。。。
user = mymailuser
password = mypassword
hosts = 127.0.0.1
dbname = mynamemailserver
query = SELECT quota FROM mailbox WHERE username='%s' AND active = '1'
vi /etc/postfix/mysql-virtual-mailbox-maps.cf
这个是最关键的登录查询了
user = mymailuser
password = mypassword
hosts = 127.0.0.1
dbname = mynamemailserver
query = SELECT CONCAT(domain,'/',maildir) FROM mailbox WHERE username='%s' AND active = '1'
d.配置开启哪些邮件服务
cp /etc/postfix/master.cf /etc/postfix/master.cf.orig
vi /etc/postfix/master.cf
允许smtp走ssl,在端口 25,另外还有587和465(这个不懂),反正就是把submission和smtps前面注释去掉。
#
# Postfix master process configuration file.  For details on the format
# of the file, see the master(5) manual page (command: "man 5 master").
#
# Do not forget to execute "postfix reload" after editing this file.
#
# ==========================================================================
# service type  private unpriv  chroot  wakeup  maxproc command + args
#               (yes)   (yes)   (yes)   (never) (100)
# ==========================================================================
smtp      inet  n       -       -       -       -       smtpd
#smtp      inet  n       -       -       -       1       postscreen
#smtpd     pass  -       -       -       -       -       smtpd
#dnsblog   unix  -       -       -       -       0       dnsblog
#tlsproxy  unix  -       -       -       -       0       tlsproxy
submission inet n       -       -       -       -       smtpd
#  -o syslog_name=postfix/submission
#  -o smtpd_tls_security_level=encrypt
#  -o smtpd_sasl_auth_enable=yes
#  -o smtpd_client_restrictions=permit_sasl_authenticated,reject
#  -o milter_macro_daemon_name=ORIGINATING
smtps     inet  n       -       -       -       -       smtpd
#  -o syslog_name=postfix/smtps
#  -o smtpd_tls_wrappermode=yes
#  -o smtpd_sasl_auth_enable=yes
#  -o smtpd_client_restrictions=permit_sasl_authenticated,reject
#  -o milter_macro_daemon_name=ORIGINATING
e.重启postfix服务
service postfix restart
f.配置dovecot
cp /etc/dovecot/dovecot.conf /etc/dovecot/dovecot.conf.orig
cp /etc/dovecot/conf.d/10-mail.conf /etc/dovecot/conf.d/10-mail.conf.orig
cp /etc/dovecot/conf.d/10-auth.conf /etc/dovecot/conf.d/10-auth.conf.orig
cp /etc/dovecot/dovecot-sql.conf.ext /etc/dovecot/dovecot-sql.conf.ext.orig
cp /etc/dovecot/conf.d/10-master.conf /etc/dovecot/conf.d/10-master.conf.orig
cp /etc/dovecot/conf.d/10-ssl.conf /etc/dovecot/conf.d/10-ssl.conf.orig
vi /etc/dovecot/dovecot.conf
!include conf.d/*.conf
# Enable installed protocols
!include_try /usr/share/dovecot/protocols.d/*.protocol
protocols = imap pop3 lmtp
vi /etc/dovecot/conf.d/10-mail.conf
#这个配置很重要
mail_location = maildir:/var/mail/vhosts/%d/%n
mail_privileged_group = mail
检查权限
ls -ld /var/mail
应该是这样
drwxrwsr-x 2 root mail 4096 Mar 6 15:08 /var/mail
mkdir -p /var/mail/vhosts/example.com
groupadd -g 5000 vmail
useradd -g vmail -u 5000 vmail -d /var/mail
chown -R vmail:vmail /var/mail
vi /etc/dovecot/conf.d/10-auth.conf
disable_plaintext_auth = yes
auth_mechanisms = plain login
#!include auth-system.conf.ext
!include auth-sql.conf.ext
#!include auth-ldap.conf.ext
#!include auth-passwdfile.conf.ext
#!include auth-checkpassword.conf.ext
#!include auth-vpopmail.conf.ext
#!include auth-static.conf.ext
vi /etc/dovecot/conf.d/auth-sql.conf.ext
passdb {
  driver = sql
  args = /etc/dovecot/dovecot-sql.conf.ext
}
userdb {
  driver = static
  args = uid=vmail gid=vmail home=/var/mail/vhosts/%d/%n
}
vi /etc/dovecot/dovecot-sql.conf.ext
driver = mysql
connect = host=127.0.0.1 dbname=mailserver user=mailuser password=mailuserpass
default_pass_scheme = SHA512-CRYPT
#注意这2个表现在还没有,后面postfixadmin会建的
password_query = SELECT password FROM mailbox WHERE username = '%u'
user_query = SELECT maildir, 502 AS uid, 502 AS gid FROM mailbox WHERE username = '%u'
chown -R vmail:dovecot /etc/dovecot
chmod -R o-rwx /etc/dovecot
vi /etc/dovecot/conf.d/10-master.conf
#禁止不加 密登录
service imap-login {
    inet_listener imap {
      port = 0
    }
  ...
  }
  service pop3-login {
    inet_listener pop3 {
      port = 0
    }
  ...
  }
#lmtp
  service lmtp {
   unix_listener /var/spool/postfix/private/dovecot-lmtp {
     mode = 0600
     user = postfix
     group = postfix
    }
    # Create inet listener only if you can't use the above UNIX socket
    #inet_listener lmtp {
      # Avoid making LMTP visible for the entire internet
      #address =
      #port =
    #}
  }
#auth
service auth {
  # auth_socket_path points to this userdb socket by default. It's typically
  # used by dovecot-lda, doveadm, possibly imap process, etc. Its default
  # permissions make it readable only by root, but you may need to relax these
  # permissions. Users that have access to this socket are able to get a list
  # of all usernames and get results of everyone's userdb lookups.
  unix_listener /var/spool/postfix/private/auth {
    mode = 0666
    user = postfix
    group = postfix
  }
  unix_listener auth-userdb {
    mode = 0600
    user = vmail
    #group =
  }
  # Postfix smtp-auth
  #unix_listener /var/spool/postfix/private/auth {
  #  mode = 0666
  #}
  # Auth process is run as this user.
  user = dovecot
}
#auth-worker
service auth-worker {
  # Auth worker process is run as root by default, so that it can access
  # /etc/shadow. If this isn't necessary, the user should be changed to
  # $default_internal_user.
  user = vmail
}
检查自签名证书,非常重要
ls /etc/dovecot/dovecot.pem
ls /etc/dovecot/private/dovecot.pem
vi /etc/dovecot/conf.d/10-ssl.conf
强制ssl
ssl_cert = </etc/dovecot/dovecot.pem
ssl_key = </etc/dovecot/private/dovecot.pem
ssl = required
重启dovecot服务
service dovecot restart
5.安装postfixadmin
a.下载安装postfixadmin
wget 'http://downloads.sourceforge.net/project/postfixadmin/postfixadmin/postfixadmin-2.92/postfixadmin-2.92.tar.gz?use_mirror=jaist'
tar zxvf postfixadmin-2.92.tar.gz
mv postfixadmin-2.92 /var/www/example.com/public_html/postfixadmin
这时候/var/www/example.com/public_html/postfixadmin下应该有config.inc.php文件,否则就是再嵌了个文件夹了。。。
b.修改配置文件
vi config.inc.php
$CONF['default_language'] = 'cn';
$CONF['configured'] = true;
$CONF['default_language'] = 'en';
$CONF['database_type'] = 'mynamemailserver';
$CONF['database_host'] = '127.0.0.1';
$CONF['database_user'] = 'mymailuser';
$CONF['database_password'] = 'mypassword';
汉化不完全的可以打开language下的cn.lang手工修改。。。
c.用浏览器访问Postfixadmin的设置页http://pfadmin.example.com/setup.php,会进行检查,各项ok后,最后自动生成数据表,shell下检查一下,如果是这些就ok了:
show tables;
...
| admin                         |
| alias                         |
| alias_domain                  |
| config                        |
| domain                        |
| domain_admins                 |
| fetchmail                     |
| log                           |
| mailbox                       |
| quota                         |
| quota2                        |
| vacation                      |
| vacation_notification         |
...
d.在浏览器页面下面创建Setup password,填复杂一些,点击“Generate password hash”获取hash代码,将代码拷贝到配置文件config.inc.php中的以下配置中
$CONF['setup_password'] = 'changeme';#(用hash代码替换changeme)
e.然后重启apache2服务:
service apache2 restart
f.再次访问http://pfadmin.example.com/setup.php,创建管理员的账号和密码
(需要正确输入之前创建的Setup password(填的不是hash值)才能创建管理员账号)
设置完成后要做一些安全工作
rm setup.php
chown root config.inc.php
g.最后访问PostfixAdmin的登录页http://pfadmin.example.com/
使用管理员账号登录后,就可以添加domain和多用户邮箱什么的了。
6.安装rainloop
其实webmail有很多,为啥选这个呢,因为这个干净,纯php webmail前台页面,它并不创建一个数据库,应用直接访问邮件服务器来显示电子邮件。解压就能用,支持多国语言。
a.下载解压
mkdir /var/www/example.com/public_html/webmail
cd /var/www/example.com/public_html/webmail
wget http://repository.rainloop.net/v2/webmail/rainloop-latest.zip
unzip rainloop-latest.zip
rm rainloop-*.zip
这时候webmail目录下应该有个index.php,还有2个文件夹data和rainloop,否则又是嵌套了一层。
b.设置权限
cd /var/www/example.com/public_html/webmail
find . -type d -exec chmod 755 {} \;
find . -type f -exec chmod 644 {} \;
chown -R www-data:www-data .
c.直接访问管理页面进行配置:
URL : http://webmail.example.com/?admin
User : admin
Pass : 12345
登陆以后进行修改,设置复杂密码。
d.设置主要是修改几个地方:
Login 里面不要填default domain,如果你只有一个domain的话,选择Try to determine user domain
Domain 里面 add domain,然后点击新增的domain名字,填写imap和smtp信息,注意不要选use short login,我发现选了以后反而是disabled,不选反而ok。。然后smtp我选的是use php mail(),否则test通不过。
按上面的设置,正确的应该是:Port 993 for secure IMAP, Port 995 for secure POP3, and Port 25 with SSL for SMTP
大工告成!
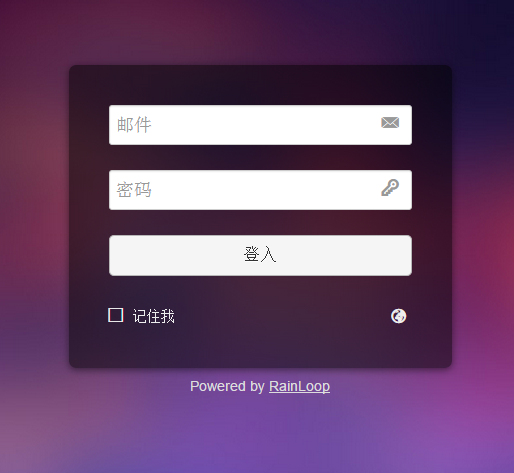
访问http://webmail.example.com/ 就可以登录邮箱了。或者用第三方客户端进行设置以后也可以使用,第三方客户端设置时,接收服务可选IMAP 993 SSL(接受所有证书)或POP3 995 SSL(接受所有证书),发送服务选SMTP 25 STARTTLS(接收所有证书)。这里之所以用dovecot自签名的证书,是因为穷!商业证书都太贵了,土豪可以选Verisign。。。
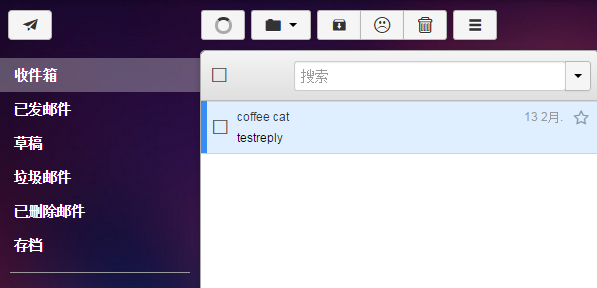
最后发2个图。
参考文档:
1.https://www.linode.com/docs/getting-started
2.https://www.linode.com/docs/websites/hosting-a-website
3.https://www.linode.com/docs/email/running-a-mail-server
4.https://www.linode.com/docs/email/postfix/email-with-postfix-dovecot-and-mysql
5.http://help.163.com/09/1223/14/5R7P6CJ600753VB8.html
6.http://help.163.com/10/0203/13/5UJONJ4I00753VB8.html
7.http://www.sulabs.net/?p=311
8.http://www.tecmint.com/rainloop-webmail-a-modern-fast-web-based-email-client-for-linux/